In this tutorial, we will walk through the process of building a REST API using Total.js LessCode, which offers a visual programming interface. We will cover how to handle requests and responses using Total.js LessCode.
How to create REST API using Total.js LessCode
In this tutorial, we will walk through the process of building a REST API using Total.js LessCode, which offers a visual programming interface. We will cover how to handle requests and responses using Total.js LessCode.
What is Total.js LessCode
Total.js LessCode is an application that simplifies and enables the fast building of APIs, like its name suggests, with less coding. The app uses the Total.js Flow engine, so it can take advantage of all its benefits. Total.js Flow offers a visual programming interface.
Installation
First of all, make sure you have at least version 19 of Node.js installed. If not, proceed to install Node.js.
You can install the application either manually or using Docker, I will be proceeding with the manual installation. However, if you prefer to use Docker, instructions for Docker installation can be found here: https://github.com/totaljs/lesscode
Manual installation:
To install Total.js LessCode manually, visit the GitHub repository Total.js LessCode and either download the code manually or clone the repository using your terminal. Use the following command:
This command will download the LessCode source code to your computer and save it to a lesscode-app folder. Open the lesscode-app directory in the code editor you prefer and install the dependencies:
With the dependencies installed, your Total.js LessCode application is now successfully set up, and we are ready to run the application.
Running the application
Run npm start in the terminal to run the app. Be sure you are in lesscode-app folder.
The LessCode app is now running on your local machine.
The app will automatically generate your token. This token is essential for accessing the Flow editor. You will see a URL in your terminal or command-line output. It will look like this:
http://127.0.0.1:8000/flowstreams/?token=YOUR_TOKEN_GENERATED_BY_THE_APP
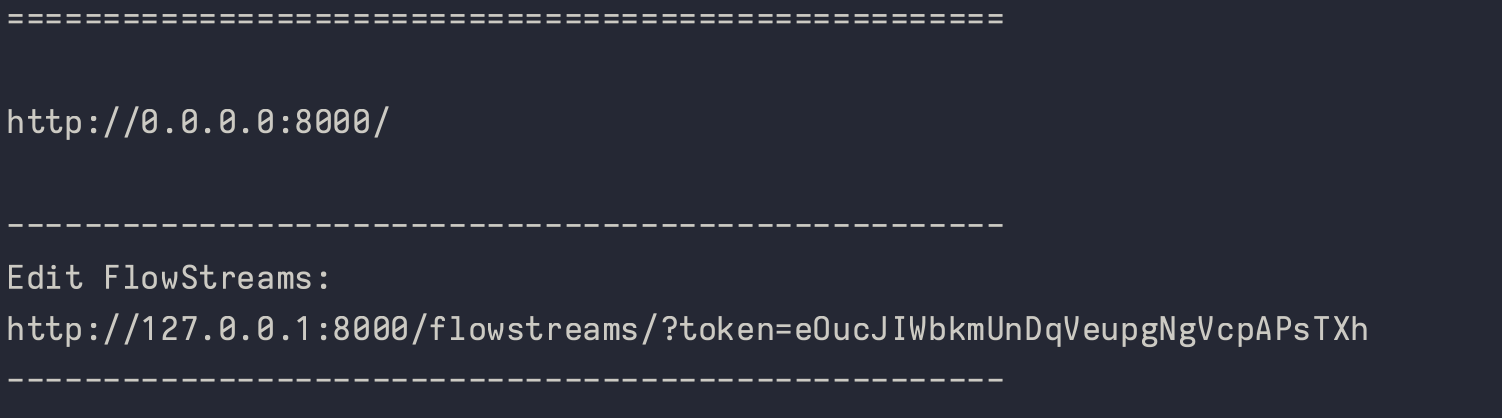
Simply copy this URL into your web browser to access the Flow editor, and we are ready to start editing in the visual programming interface.
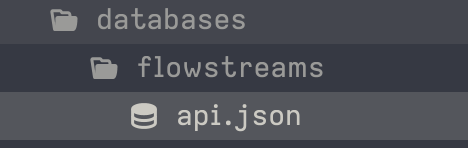
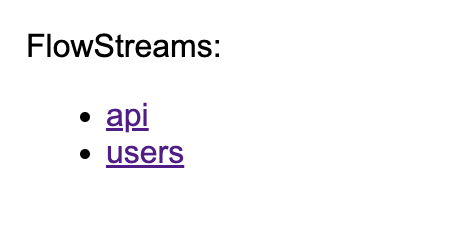
You should now see one flowstream called api.
What are flowstreams? Flowstream is simply a JSON file that stores all changes and information about the visual interface you utilize. All components you use, their configurations, positions, and many more...
You can have multiple flowstreams in your app.
In the LessCode app, flowstreams are located in the /databases/flowstreams/{name}.json directory, where {name} represents the specific flowstream file name.
Now that we have a basic understanding of flowstreams, let's see them in action. Start by clicking on the api flowstream in the LessCode app. Here, you will find the welcome endpoint. Next, open a new tab in your browser and navigate to http://localhost:8000/. If a welcome message appears, this confirms that everything is working correctly. Additionally, you'll notice a visual indication within the flowstream each time the endpoint is triggered.
Building REST API
To begin building our REST API, we'll start by creating a new flowstream file users.json in the /databases/flowstreams/ directory. Then, add the following JSON structure to this file:
Next, open the config file in the root directory of the app and just save it. Now navigate to http://127.0.0.1:8000/flowstreams/?token=YOUR_TOKEN_GENERATED_BY_THE_APP and you should see users flowstream. If you don't see it, try reloading the page.
Now click on users flowstream. On the left side of the side panel, press the download button to download the components we will need for our API.
Routefor defining routesActionfor creating CRUD API and validationsResponsefor handling responsesPrintfor printing data
Firstly, we need to set up a database. In Total.js, we use the Total.js QueryBuilder for database connectivity. For this example, I'll be utilizing PostgreSQL.
To connect the application to the database, first add your database connection string to the config file in the root directory of your project. It should look like this:
database : YOUR_CONNECTION_DATABASE_URL
To initialize the database connection. On the top of the definitions/init.js add the following code:
require('querybuilderpg').init('default', CONF.database);
Use this SQL command to create a table named 'tbl_users' with three fields: 'id', 'name', and 'age':
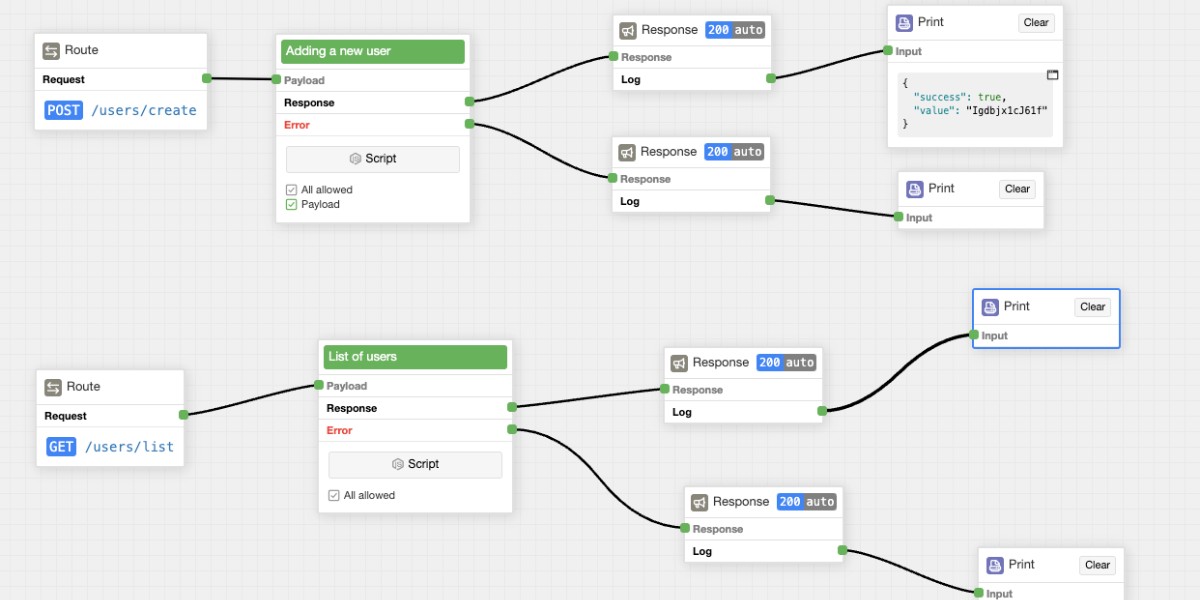
Adding a new user to the database:
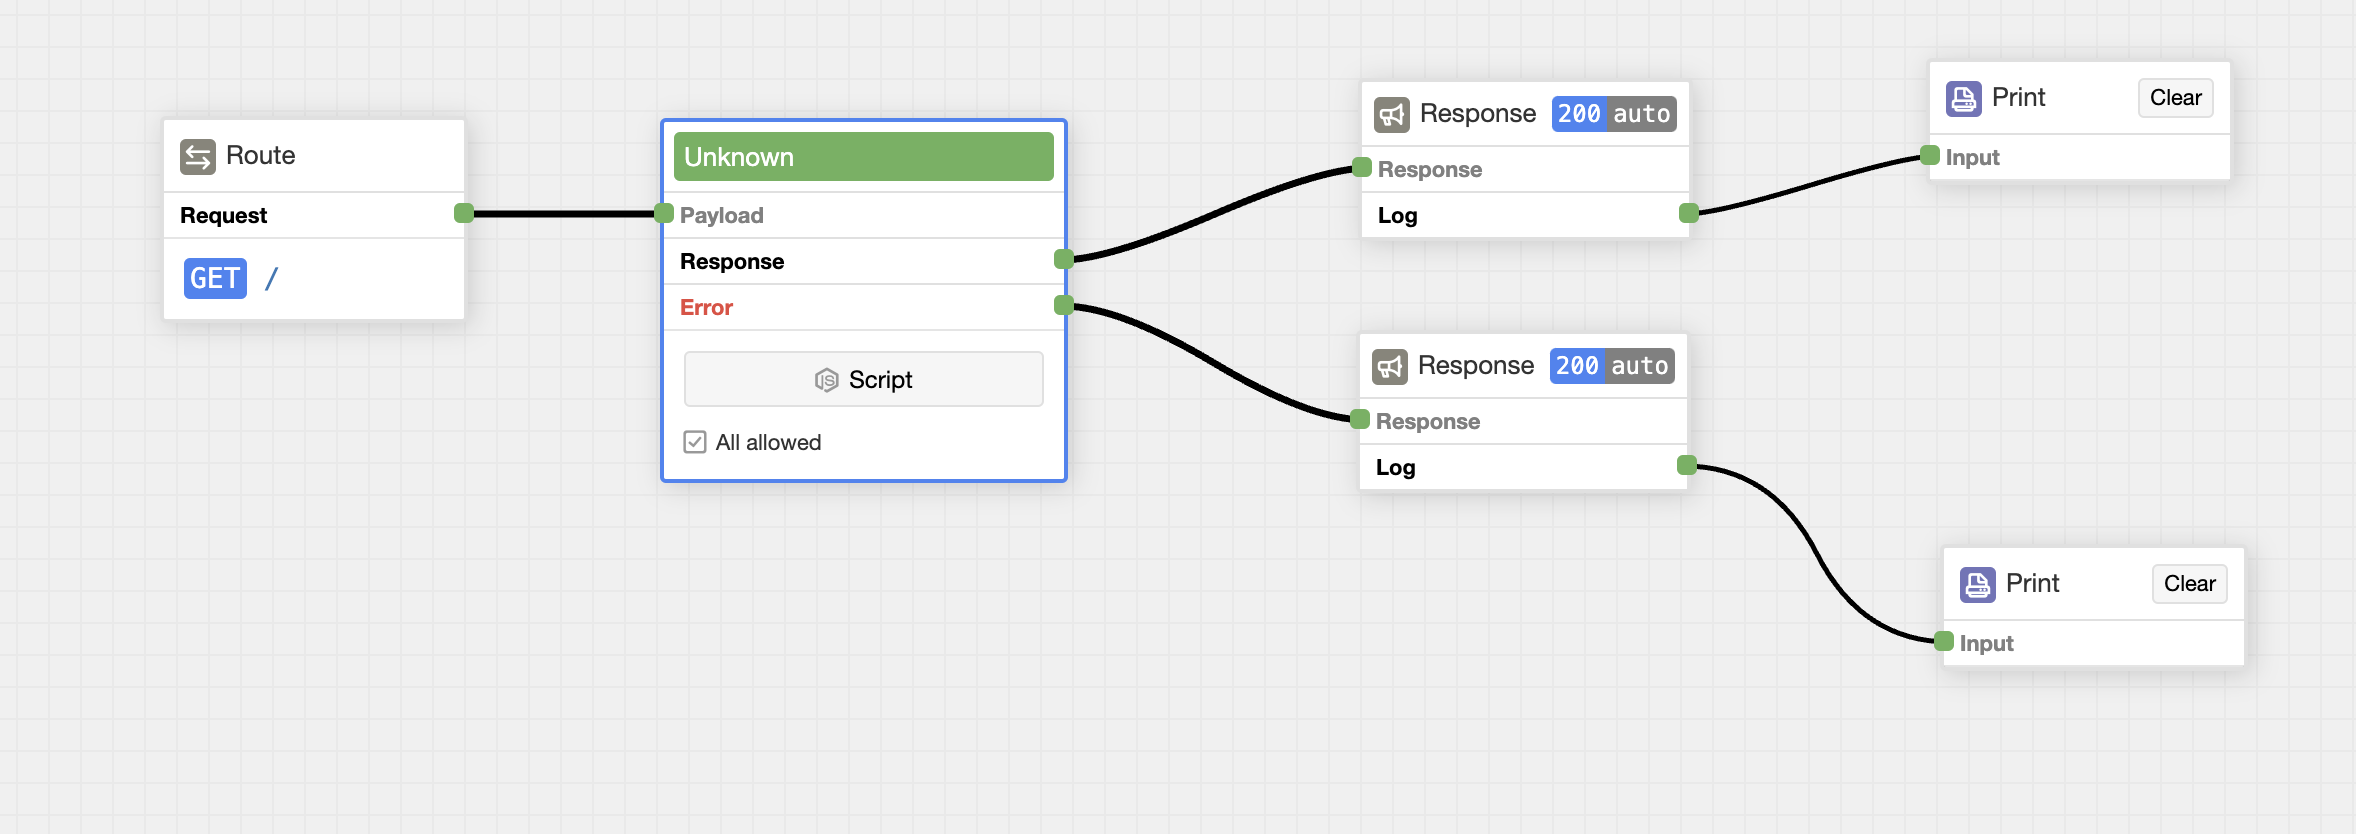
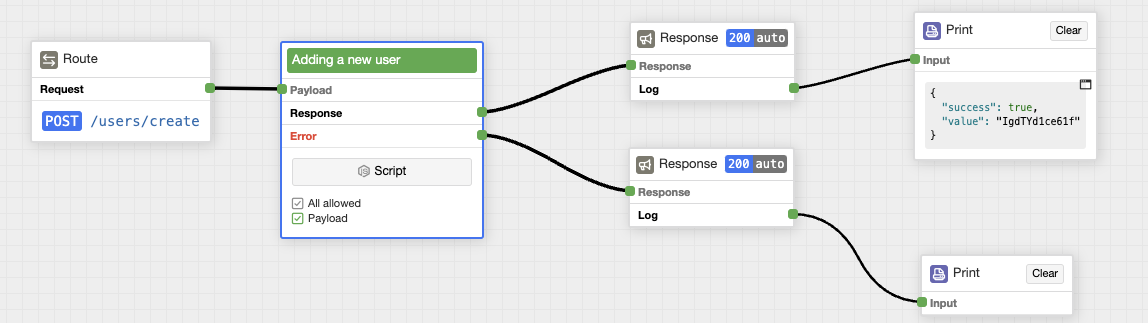
In our users flowstream, drag and drop components on the main area of Flow interface. And connect them, like in the picture below:
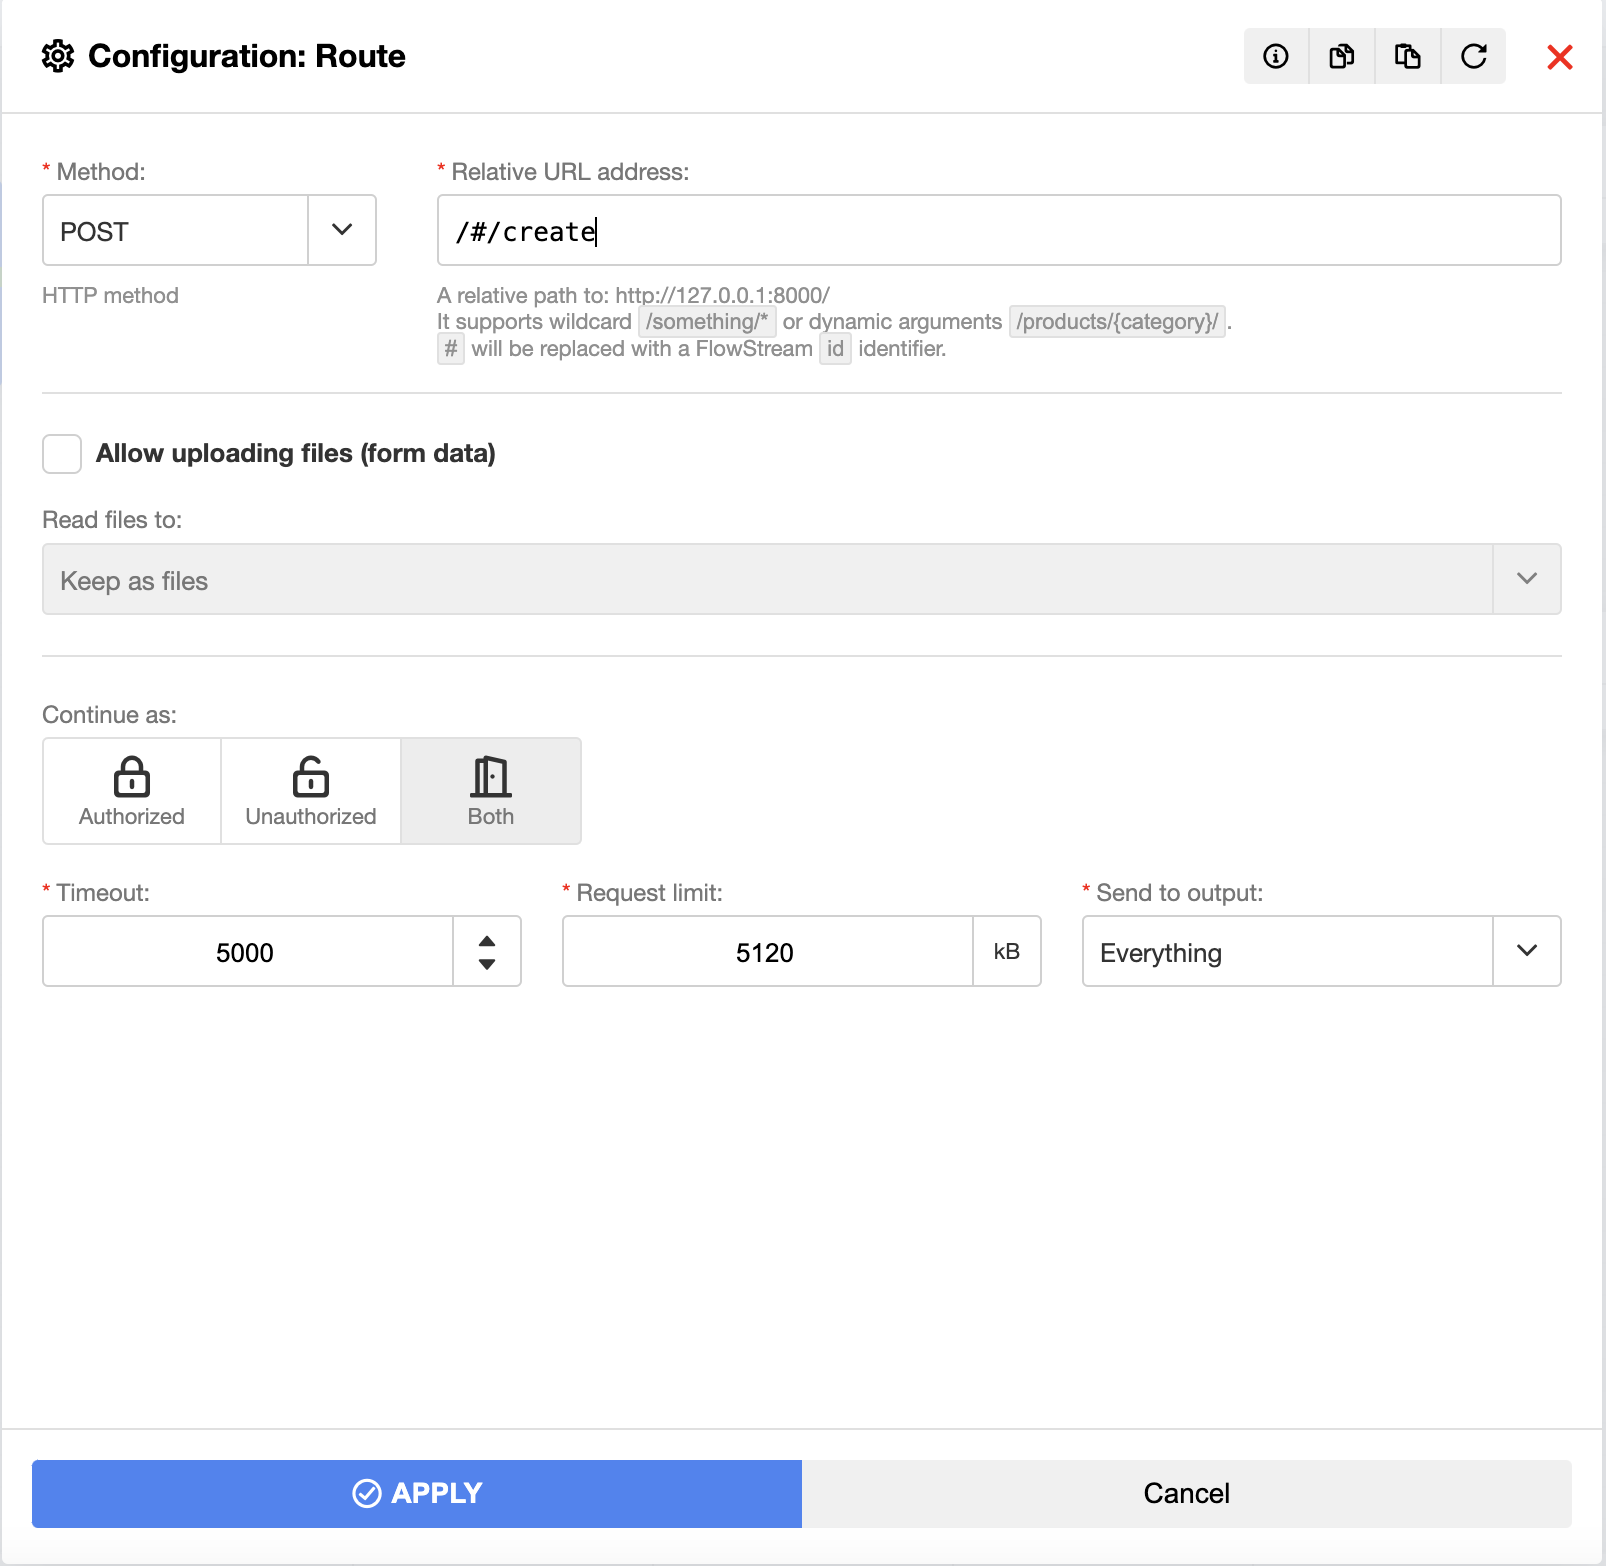
Double-click on component Route and configure it like on the picture below. In this component, you can set the method of request and multiple parameters, such as a timeout, a request limit if you need to be authenticated or not, and more... Character # in relative url means the ID of flowstream so if you set an ID like me, users, this will be transferred from /#/create to /users/create. This helps in creating clear and meaningful paths for your API endpoints.
Next, we need to configure component Action and set the expected payload. This component creates similar functionality as Total.js Actions. You will find all supported data types. In the payload schema, the character * means that a value is required. This component also supports await keyword out of the box.
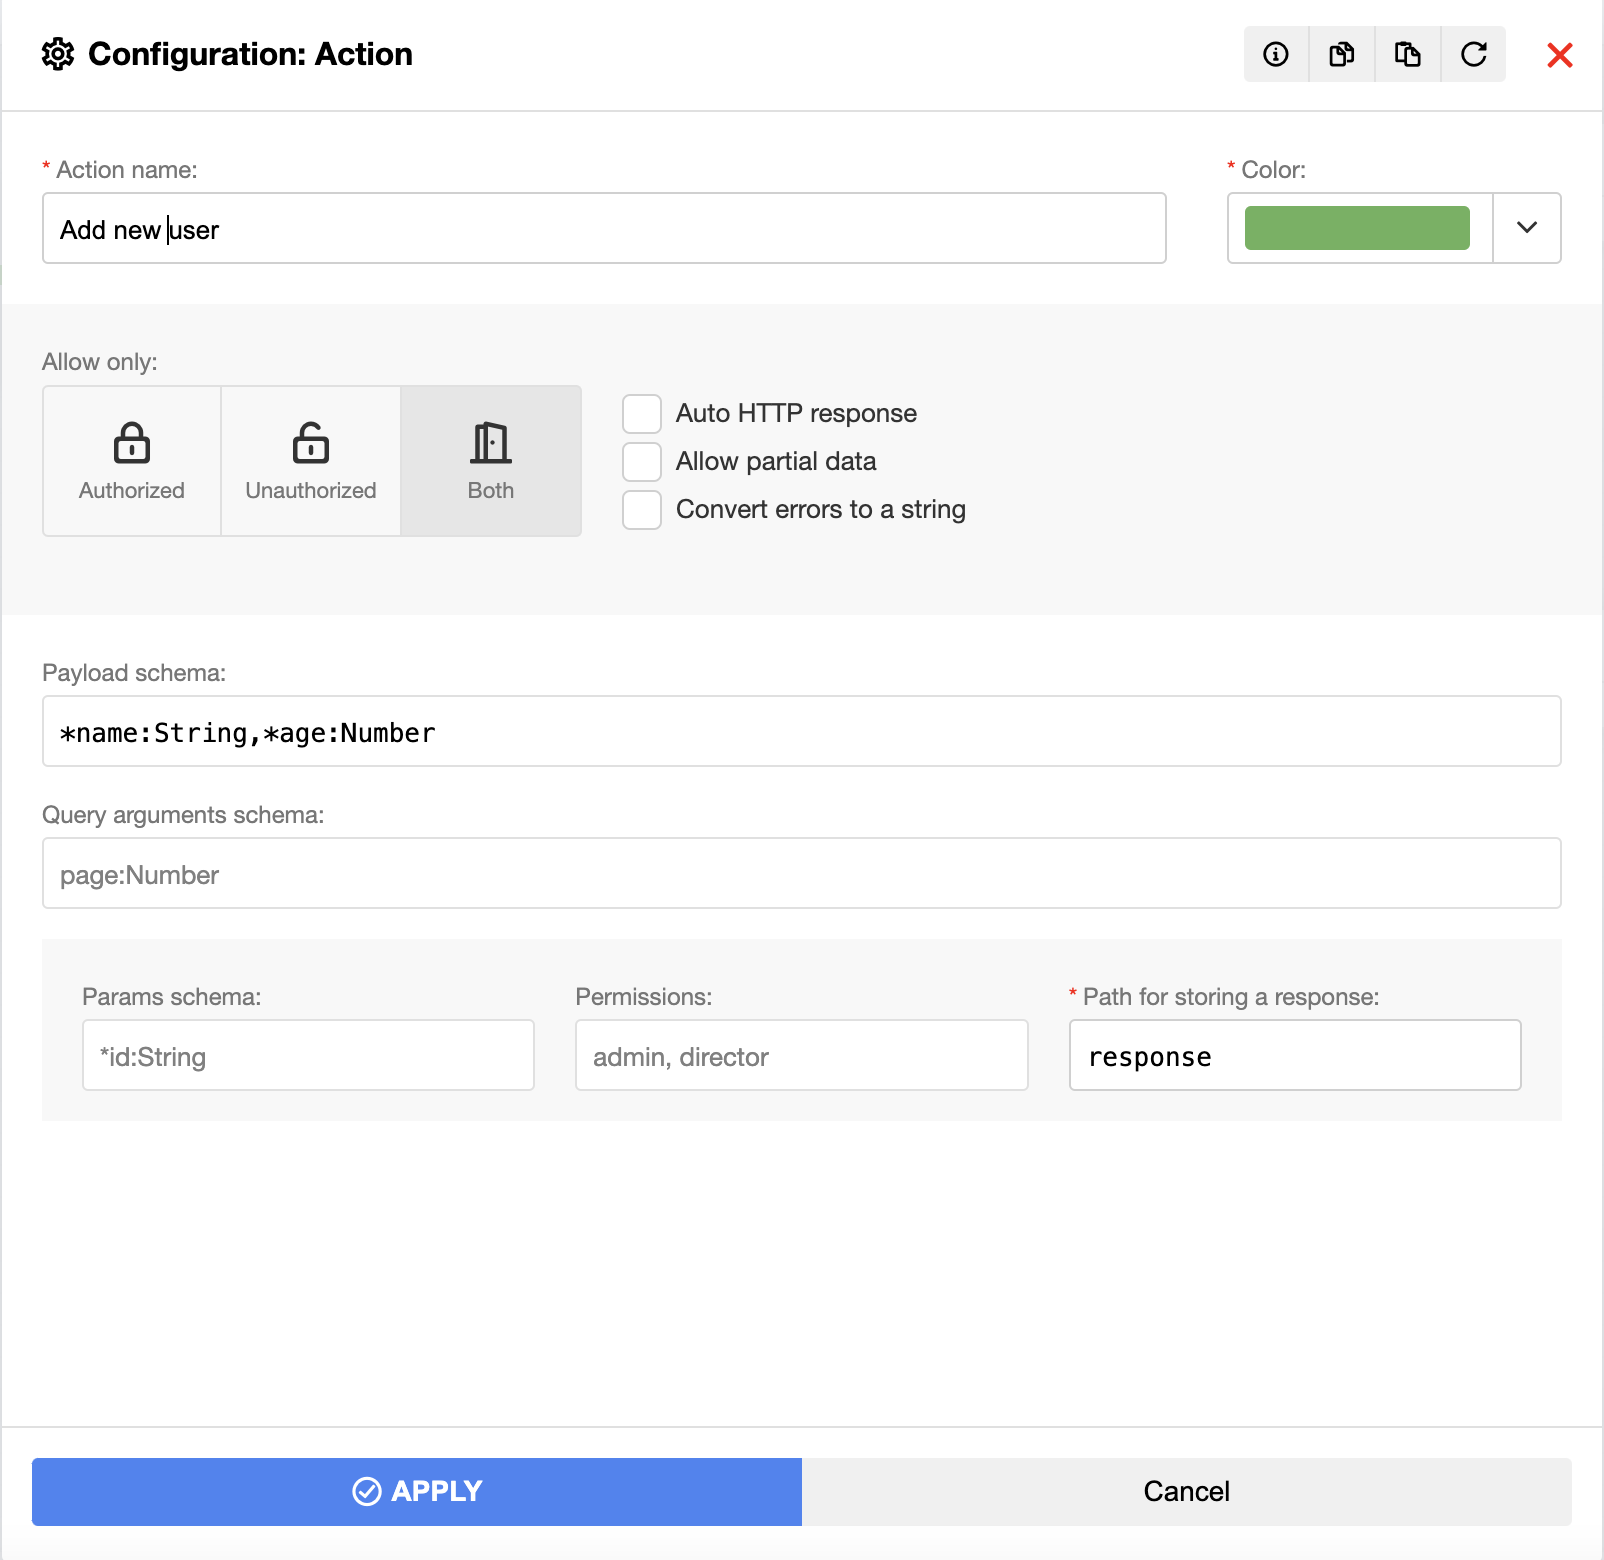
Now click on the button script in the Action component. Here, you can write Javascript code mostly for database queries. On the object called model, our payloads, with name and age, are attached, so we just generate a unique ID for the user, insert it into the database, and we can call the endpoint.

Use a tool like Postman to test the API by sending requests.

Once you send the request, you should be able to see the expected response displayed in the print component.
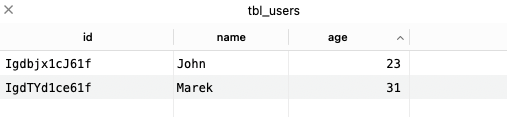
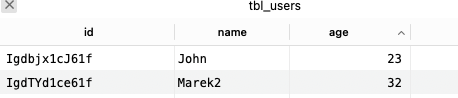
We can add second user with values for example : { name: 'John', age: 23 }.
Now we have 2 users in the database:
Getting a list of users
To create a new route, we need to drag new components to the main area of Flow and configure components
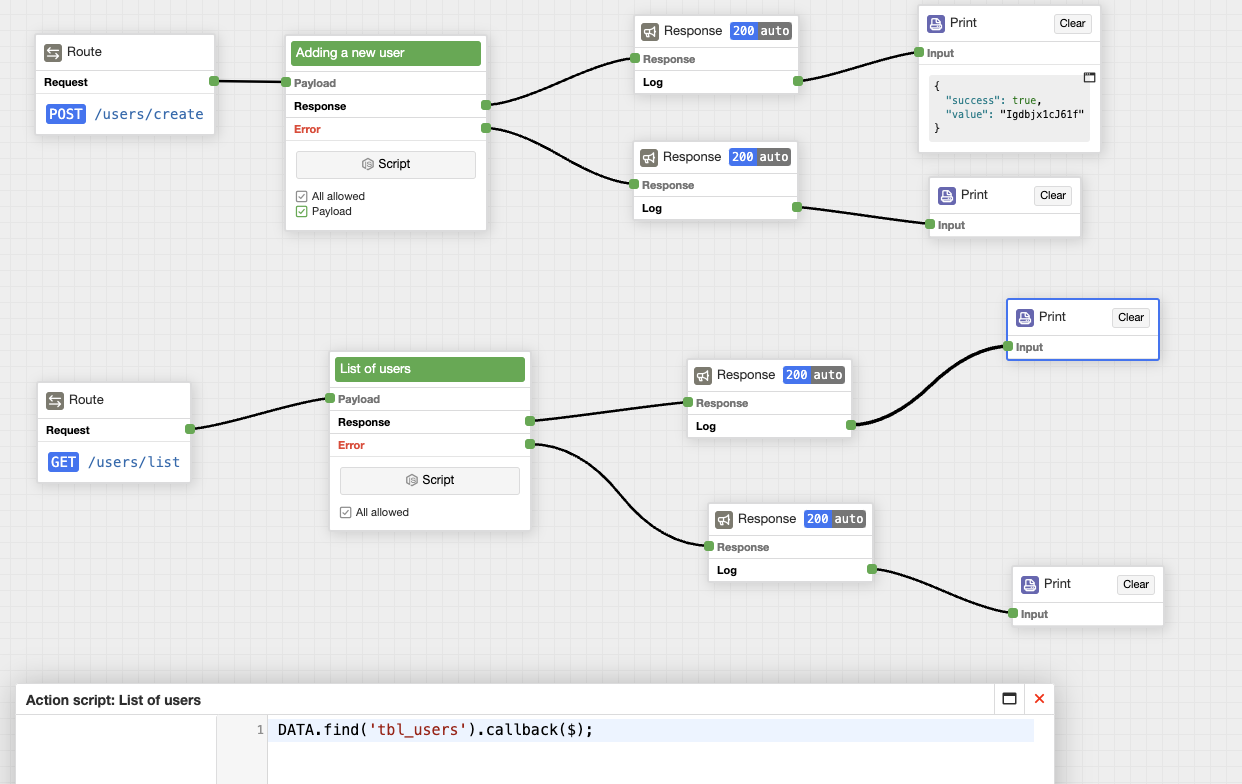
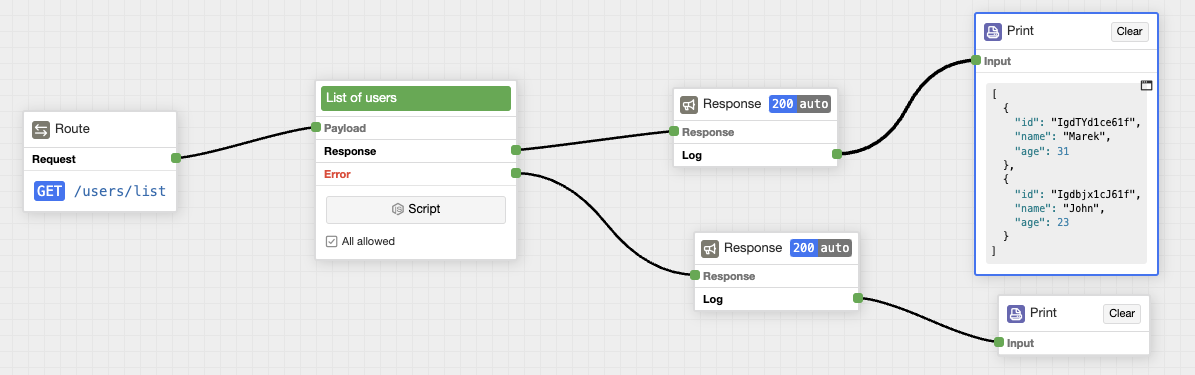
Hit the endpoint with postman or some other testing API tool:
After you send a request to the new endpoint, you should see a list of users in the print component.
Getting one user
Drag new components to the main area of Flow and configure them. First of all, we need to set up a dynamic parameter for the URL in the component Route.

Then, in component Action, set up the Params schema as required and expected type of dynamic value.
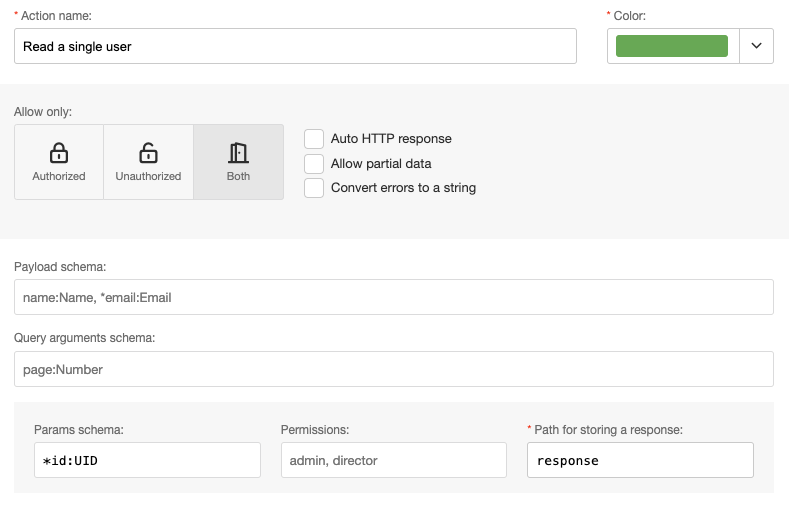
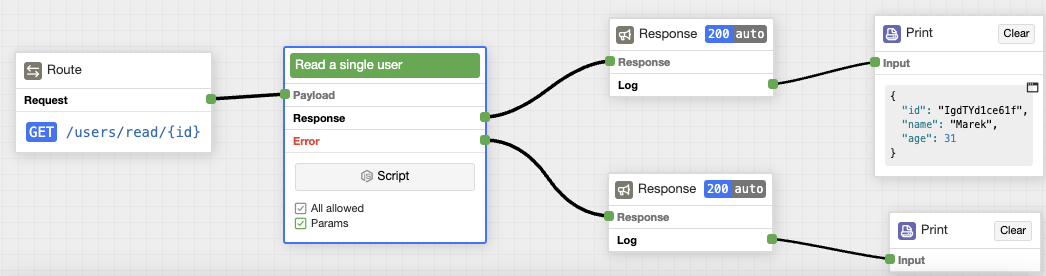
Next, create a database query in component Action. Dynamic parameters are attached to the $.params object.

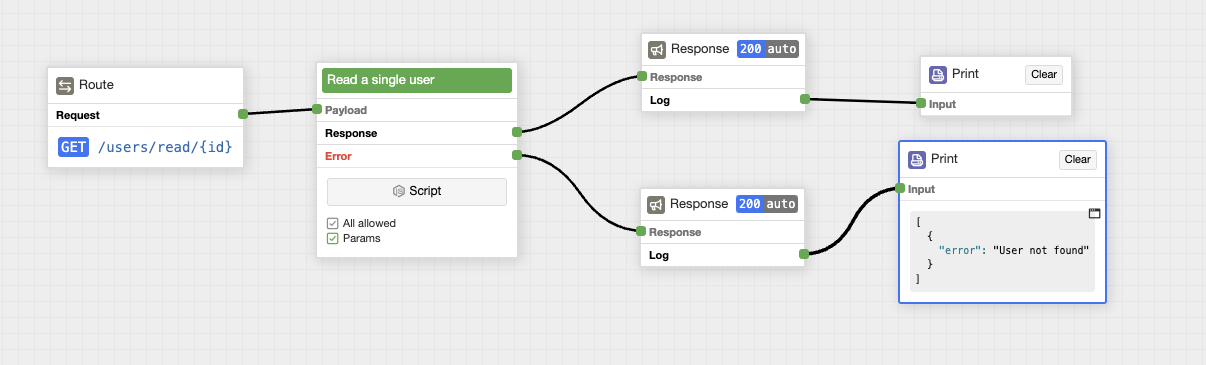
Now, when you send a request with the ID of any user in our database, if the ID matches the user's ID in the database, we get his data, otherwise, we get an error.
If an error occurs:
Updating a user
Drag new components to the main area of Flow interface and configure them.
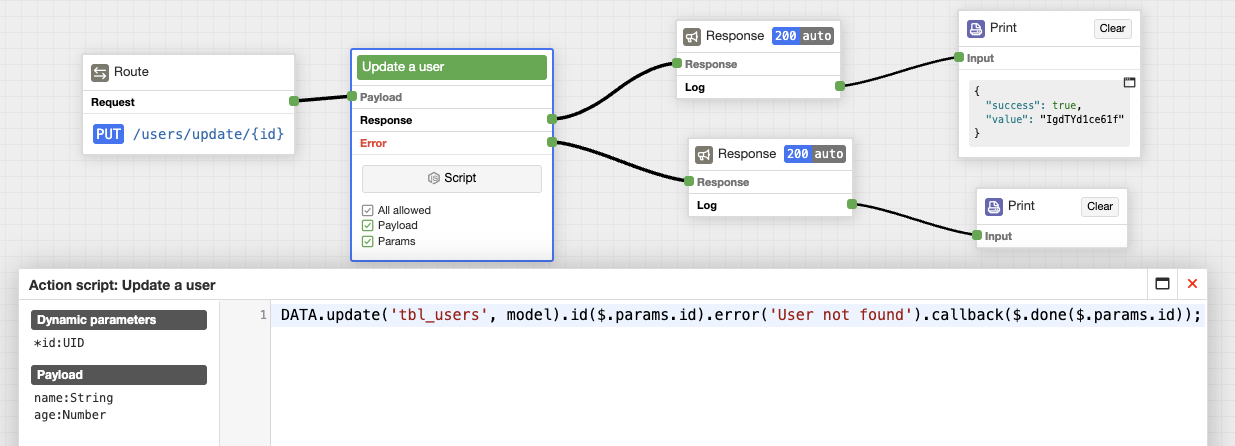
Hit the endpoint with the ID of the user you want to update:
When you check the user in the database, you can see the user was updated:
Removing a user
Drag new components to the main area of Flow and configure them.
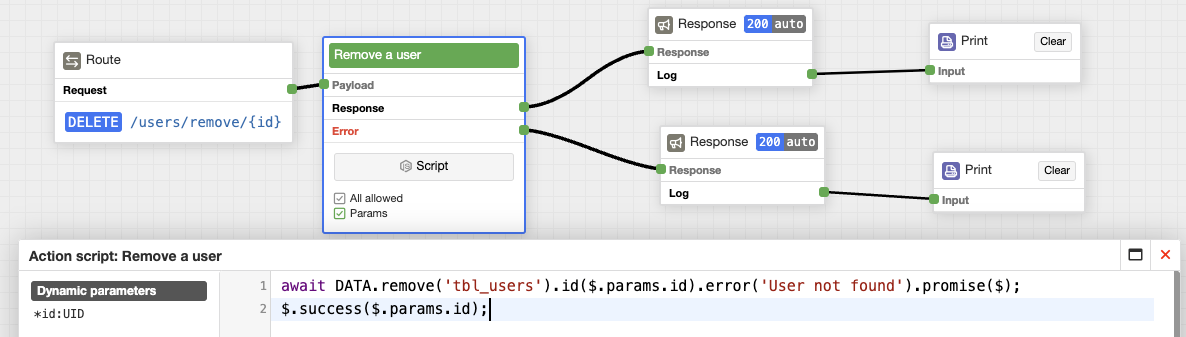
By hitting endpoint with ID of user. User will be removed from database:
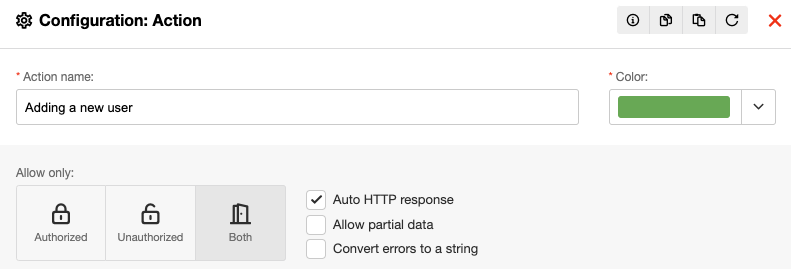
A useful tip at the end
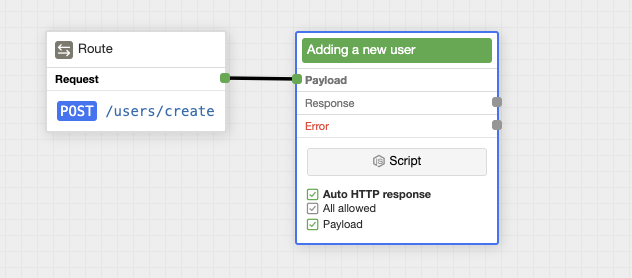
If you check the 'Auto HTTP response' option in the Action component, there's no need for a separate response component, everything will still work.
You will need only Route and Action components:
Conclusion
That’s it! Now we can test all our endpoints with Postman by sending requests to each route and verifying that the correct response is returned. This is a basic example of building a REST API with Total.js LessCode. From here, we can continue to expand our API by adding more routes and more flowstreams.
Other posts from Total.js Platform
- 2026-07-24NEWTotal.js AIModel: a practical foundation for AI-powered workflows
- 2026-07-01June report 2026
- 2026-06-0214 Years of Building the Total.js Platform - Day by Day 🚀
- 2026-06-01May report 2026
- 2026-05-01April report 2026
- 2026-04-28Total.js without NPM? Absolutely. Run the framework from pure Node.js
- 2026-04-01March report 2026
- 2026-03-02February report 2026
- 2026-02-02January report 2026
- 2026-01-02December report 2025